
How to Clean Up Your Desktop Icons for a Productive and Streamlined Workstation: 10 Helpful Tips

By cstec@hubspot.com (Carly Stec)
![Download Now: How to Be More Productive at Work [Free Guide + Templates]](https://no-cache.hubspot.com/cta/default/53/be08853d-7ccb-4ab6-ba13-ef66a1d9b4ff.png)
Digital clutter can leave you feeling stressed, make your devices slow, and create roadblocks throughout your workday. That’s why it’s essential to maintain a clean desktop.
If your digital space is organized, you can quickly accumulate important documents, projects, and pictures. This can be especially helpful if you use the same computer for both your professional and personal life.
The good news is that keeping your computer’s desktop clean and organized is easier than it seems. This post gathers tips to help you create a clean, organized desktop that supports productivity.
10 Computer Desktop Organizing Tips
These organization tips will help you turn a cluttered desktop into a clean and productive workspace. Don’t hesitate to test different methods to see what works best for your typical workflow!
1. Create a folder system.
Be honest: How many files do you have on your desktop right now? 10? 20? 100? Have you lost count? If your desktop looks anything like the image below, start by moving everything into one folder to clear the air.
Creating a Folder on a Mac
- To create a new folder on a Mac, right-click on your desktop and select “New Folder” from the menu.
- You can also press Shift + Command + N. The folder will appear on your desktop instantly.
- To change the folder’s name, double-click on “untitled folder.” Then, you’ll be able to edit a text box with a new name.
Creating a Folder on a PC
- To create new folders in Windows, right-click on your desktop.
- Select New > Folder from the menu or press Ctrl + Shift + N.
- To rename the folder, click on it, enter a new name, and then press Enter.
Once you have your folders created, you can divvy up your files. How you organize your folder system will depend on your specific role.
For example, I frequently write blog posts containing many visual examples. To simplify the process and keep a record of what I’ve included in the past, I’ve created two folders: “Current Examples” and “Example Archive.”
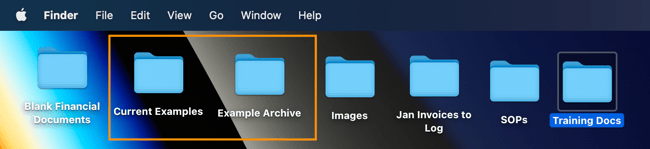
When I’m rounding up examples for a new post from the web, I drop them in the “Current Examples” folder. This way, I can easily locate them when I write the post. After scheduling the post, I move the images to the “Example Archive” folder to make room for my next post.
2. Choose a naming convention …read more
Source:: HubSpot Blog


Author: Aaron
Related Articles

The 9 Best Ways to Send Large Files
By Caroline Forsey We all know the frustrating feeling — maybe you’ve finally finished the script for your next marketing video, or you’ve collected all…

How to Post to Instagram From Your Computer [7 Easy Steps]
By Caroline Forsey Instagram is a popular social media network for sharing photos, commonly accessed through a mobile app. Unlike other social networks, however, it…

What is Email Deliverability? Best Tips & Practices in 2023
By lkolowich@hubspot.com (Lindsay Kolowich Cox) Email marketers spend a lot of time drafting poignant email copy, designing wonderfully branded email templates, and crafting enticing email…

9 Google Drive Tips You'll Wish You Knew All Along
By lkolowich@hubspot.com (Lindsay Kolowich Cox) If you asked me to name the sites and applications I use every single day, Google Drive would be near…

How to Make an Animated GIF in Photoshop [Tutorial]
By lkolowich@hubspot.com (Lindsay Kolowich Cox) Animated GIFs are great additions to your marketing. They’re easy to consume, provide a new way to capture your viewers’…