A Nonprofits Guide To Using LinkedIn
By fneedle@hubspot.com (Flori Needle)
Your nonprofit likely takes up a lot of your time, and you might not have a huge staff to delegate responsibilities to. So, taking the time to use online platforms might not seem like the best use of your time.
However, platforms like LinkedIn can be great for nonprofits, especially for connecting with people interested in your cause, inspiring them to take action, and even hiring new employees.
You’ll have to dedicate a bit of time to use it, but it’ll pay off in the end. Read on to use this piece as a guide for creating a LinkedIn page for your nonprofit.
Table of Contents:
- How to Create a LinkedIn Page for a Nonprofit Organization
- How to Use LinkedIn for Nonprofits
- Best Nonprofit LinkedIn Profiles
How to Create a LinkedIn Page for a Nonprofit Organization
Creating a LinkedIn Page for your nonprofit helps people interested in your cause discover you, learn about your mission, and interact with you on the platform. It can also help you attract new employees if you post job openings.
Let’s go over how you can create one.
1. Navigate to LinkedIn Pages or LinkedIn.com
LinkedIn Pages is the platform’s native tool for creating a page. If you start from this site, click “Create your Page” on the Pages page.
You can also start from LinkedIn.com, which is a great option if you already have a LinkedIn Profile. To do this within your profile, tap the “Work” button in the navigation header and click “Create a Company Page+” at the bottom.
2. Select your page type.
As a nonprofit, a best practice is to select “Company.”
3. Describe your page.
The next step is to input identifying information. This includes your nonprofit’s name and an optional link to your website (sharing one can help people find you on other platforms).
You also have to create a unique URL; if it’s available, aim to make it your org name. For example, if you’re Save The Environment, your URL could be savetheenvironment.
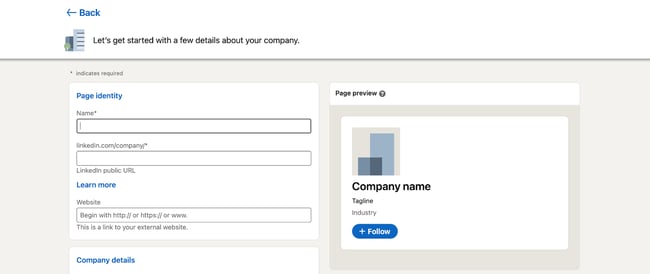
4. Add identifying company details.
In the company details section, input your industry, company size, and company type, which is where you’ll note that the page is for a nonprofit.
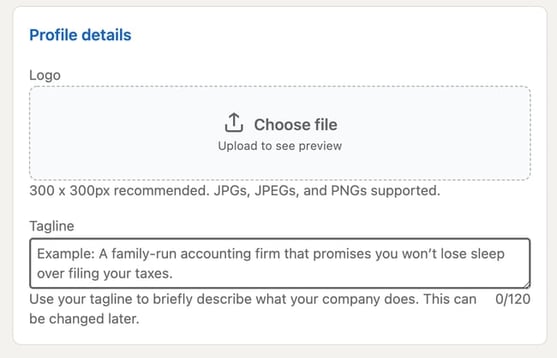
You can also add unique identifying elements to your pages, like your logo and a brief tagline to describe your mission.
5. Preview and launch your page.
Once you’ve added all your info, preview your page to ensure you’re happy with how it looks, and make any changes if you aren’t.
When you’re satisfied, click “Create Page,” and note that you’ll be asked to verify that you’re an authorized representative of the nonprofit before the page goes live.
6. Share your nonprofit story.
After you’ve created your page, you can add more information …read more
Source:: HubSpot Blog

